Why Does Your Water Heater Pilot Light Keep Going Out?
Discover the real reasons a water heater pilot light keeps going out, how to safely check the thermocouple, and when to seek professional repair.


Understanding Why a Pilot Light Keeps Going Out
When a gas water heater pilot light repeatedly goes out, it is usually a safety mechanism doing its job. Modern water heaters are equipped with control valves and safety devices designed to shut off the gas supply immediately if the flame is unstable or extinguished. While relighting the pilot light often provides a temporary fix, a recurring outage points to an underlying mechanical, environmental, or supply issue that needs to be addressed.
In the arid climate of Bullhead City, Arizona, water heaters work hard to maintain temperatures, especially during cooler winter months when incoming groundwater temperatures drop. Understanding what causes a pilot light to fail helps homeowners troubleshoot safely, avoid unnecessary stress, and recognize when a component requires replacement.
1. A Faulty or Misaligned Thermocouple
The most common reason a pilot light will not stay lit is a failing or dirty thermocouple. The thermocouple is a copper safety device positioned directly in the flame of the pilot. It generates a tiny electrical current when heated, which signals the gas control valve to keep the main gas supply open.
- Soot and Carbon Buildup: Over time, dust, debris, or incomplete combustion can coat the thermocouple tip, preventing it from reading the flame's heat accurately.
- Loose Connections: If the connection where the thermocouple screws into the gas control valve is even slightly loose, the electrical signal won't reach the valve, causing the gas to shut off.
- Component Wear: Thermocouples naturally degrade from constant exposure to high heat and eventually fail to generate sufficient voltage, even when the flame is burning properly.
A homeowner can often inspect the thermocouple for visible soot or corrosion, but a multimeter test is required to measure its electrical output accurately.
2. Drafts and Combustion Air Issues
A gas burner requires a steady supply of oxygen and a stable flame environment to stay lit. Air currents can easily blow out a small pilot flame.
If the water heater is installed in a garage, utility closet, or an area subject to strong drafts, wind gusts entering through vents or doors can extinguish the flame. Additionally, restricted combustion air—often caused by blocked intake vents near the base of the water heater—can starve the burner of oxygen, leading to a weak, flickering pilot that drops out under minor pressure changes.
3. A Defective Gas Control Valve
Sometimes the problem is not the flame or the sensor, but the control unit itself. The gas control valve (the thermostat assembly attached to the front of the tank) houses an internal electromagnet that holds the gas valve open when powered by the thermocouple.
If this internal electromagnet or the valve's internal switch fails, it will drop the valve closed seconds after the user releases the control knob, no matter how hot the thermocouple gets. Diagnosing a failing control valve requires checking electrical continuity and gas output pressures, a task best left to a qualified professional.
4. Low Gas Supply Pressure
Water heaters require consistent gas pressure to maintain a stable pilot and burner flame. If the gas regulator at the meter or the shutoff valve feeding the appliance is partially restricted, or if the household gas pressure fluctuates significantly when other appliances kick on, the pilot flame may shrink and lose contact with the thermocouple.
Gas pressure issues are rarely isolated to the water heater alone; homeowners might notice fluctuating flames on a gas stove or furnace as well. Any suspected gas supply or pressure problem requires professional evaluation for safety reasons.
What Homeowners Can Safely Check
Before calling for service, a homeowner can safely perform a few visual checks:
- Look at the flame color: A healthy pilot flame should be crisp, steady, and primarily blue with perhaps a tiny hint of yellow at the tip. If it is yellow, lazy, or floating, combustion is compromised.
- Inspect for debris: Check around the base of the unit for dust, lint, or stored items that might be restricting airflow to the burner chamber.
- Review manufacturer lighting instructions: Follow the exact sequence on the tank label when attempting to relight the unit. Holding the control knob down for the specified duration (usually 30 to 60 seconds after ignition) is critical to allow the thermocouple enough time to heat up.
When to Seek Professional Diagnosis
While relighting a pilot light is a routine homeowner task, repeated failures indicate that a part has reached the end of its lifespan or that a venting or gas supply hazard is present. If cleaning the thermocouple tip and following proper lighting procedures does not keep the flame lit, continuing to force it can flood the combustion chamber with unburned gas.
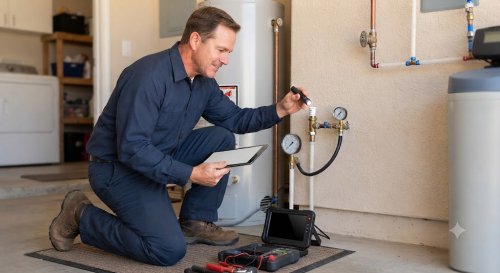
Professional technicians use specialized pressure gauges, multimeters, and combustion analyzers to isolate whether the issue is a simple thermocouple replacement, a failing control valve, or an environmental ventilation problem.